1
2
3
4
5
6
7
8
9
10
11
12
13
14
15
16
17
18
19
20
21
22
23
24
25
26
27
28
29
30
31
32
33
34
35
36
37
38
39
40
41
42
43
44
45
46
47
48
49
50
51
52
53
54
55
56
57
58
59
60
61
62
63
64
65
66
67
68
69
70
71
72
73
74
75
76
77
78
79
80
81
82
83
|
---
layout: ../../layouts/BlogLayout.astro
---
# Using imagemagick :imagemagick: to crop soy faces
I'm pretty sure everyone knows that sometimes finding a good **PNG** can be very hard, while there's always a bunch of the same **JPEG** images with the white background.
After searching for 10 minutes, you decide to remove background yourself - using [GIMP](https://gimp.org) or something like `Photoshop` or `PAINT.NET` if you are on Windows. **Forget about it!** I'm gonna show you how you can use [imagemagick](https://imagemagick.org/) to automate basic tasks like removing background and cropping images.
# Telegram sticker pack
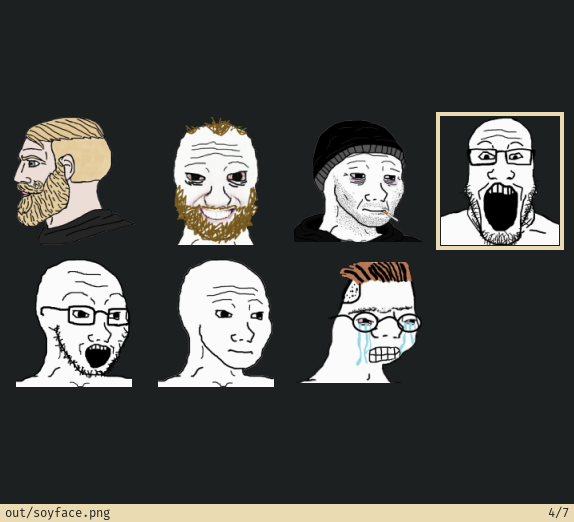
Every time I use Telegram stickers, I feel tired scrolling through many different packs trying to find the sticker I want. Sometimes, you just want them all to be in one place. That's why I created **Based Wojak** - a sticker pack which is automatically generated from random source images that I find on the internet.

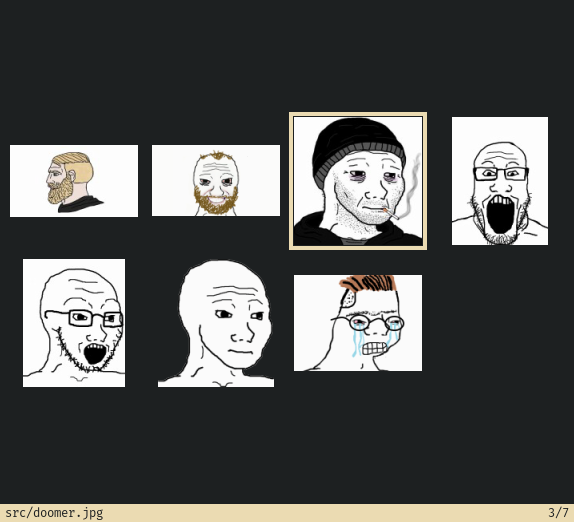
It doesn't matter if the image has a white background or wrong resolution, I just put it in the `src` folder and then magic :imagemagick: happens. For example, these are the source images used to generate the stickers above:

The collection itself is very small right now as you can see, but I plan to extend it as I need more stickers. Add this pack:
https://t.me/addstickers/BasedWojak
# Imagemagick
Now, let's see how I've done that. Here's the GitHub :github: repo so you can follow:
https://github.com/eug-vs/telegram-based-wojak
You know, I love Makefiles. I use them everywhere (where they're appropriate), even this website is generated by a `Makefile`. Let's have a look at the `Makefile` for `telegram-based-wojak`:
```Makefile
# Makefile
SOURCES=$(wildcard src/*)
OUTPUTS=$(patsubst src/%.png, out/%.png, $(patsubst src/%.jpg, out/%.png, $(SOURCES)))
SIZE=512x512
FUZZ=50%
VIEW_COMMAND=sxiv -t
all: $(OUTPUTS)
view: all
$(VIEW_COMMAND) out
viewsrc:
$(VIEW_COMMAND) src
out/%.png: src/%.*
@mkdir -p out
magick $< \
-fuzz $(FUZZ) -fill none \
-floodfill +0+0 white \
-floodfill "+%[fx:w-1]+0" white \
-trim +repage \
-resize $(SIZE) $@
clean:
rm -rf out
```
On the first two lines I just create variables for input and output images. Then I define the `SIZE` - Telegram expects sticker's largest side to be `512px`. The value of `FUZZ` determines the sensitivity of removing the background - I use `50%`, but that's just something you can play with.
Now let's have a closer look at the recipe for creating `out/%.png` from `src/%.*`. I use `magick` on the input file (denoted by `$<`), then pass a whole bunch of parameters to it, and finally provide the output file (`$@`). If you are confused by `$<` and `$@`, check out [Makefile cheatsheet](https://devhints.io/makefile).

## Removing the background
To remove background, I use `-floodfill`, here's how [imagemagick wiki](https://imagemagick.org/script/command-line-options.php) describes it:
> -floodfill {+-}x{+-}y color
>
> Floodfill the image with color at the specified offset.
>
> Flood fill starts from the given 'seed point' which is not gravity affected. Any color that matches within -fuzz color distance of the given color argument, connected to that 'seed point' will be replaced with the current -fill color.
I use it two times: one in the top-left corner and one in the top-right. Top-left corner pixel obviously has a coordinate `+0+0`. To get the X coordinate of right-most pixel I have to use this expression: `+%[fx:w-1]`, Y coordinate stays at `0` of course. Since I already supplied `-fuzz` and `-fill none`, both operations will replace the white background with `none`, starting from two top corners of the image using the supplied fuzziness value.
## Cropping the image
After we removed background, most of the time we can trim a lot of extra space so that our image size corresponds to its content. Simple `-trim +repage` does the trick.
## Adjusting the size
All we have to do now is to make sure the sticker respects the size with `-resize` option. It will resize it in a way so it fits into `512x512` box without changing the aspect ratio (largest side will always be `512px`).
|